Generate Image with Stable Diffusion XL 1.0 in Stable Diffusion Web UI
Stability AI has recently introduced Stable Diffusion XL 1.0, a groundbreaking text-to-image generation model. This model is capable of generating high-quality, photorealistic images in any style, and can handle complex concepts that are typically challenging for image models. With simple prompts, SDXL 1.0 delivers quality outputs across various platforms, heralding a new era in digital artistry and content creation.
You can access Stable Diffusion XL online for free at Clipdrop, or download the models from its Hugging Face repository for local use.
In this post, I'll guide you on how to run SDXL 1.0 using the Stable Diffusion web UI.
Accessing the Stable Diffusion XL Models
Here are the direct links to the models (subject to change):
- Stable Diffusion XL Base
- sd_xl_base_1.0.safetensors
- sd_xl_base_1.0_0.9vae.safetensors
- sd_xl_offset_example-lora_1.0.safetensors: This fixes a bug in how diffusion models are trained.
- Stable Diffusion XL Refiner
Understanding the Models and Pipeline
Before you start, it's important to understand the working pipeline of SDXL 1.0. Here's the official description:
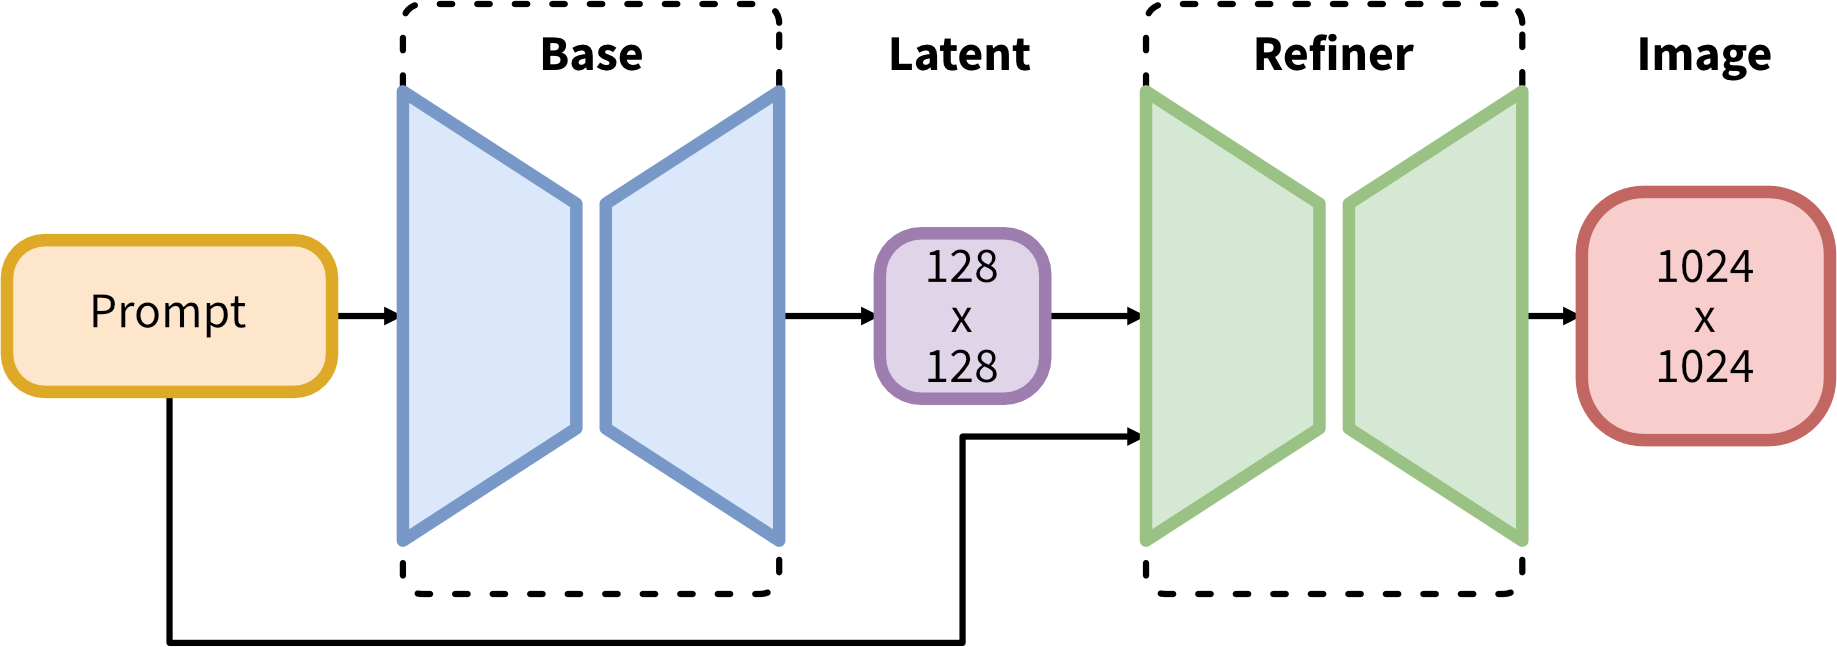
SDXL operates on an ensemble of experts pipeline for latent diffusion. Initially, the base model generates (noisy) latents, which are then further refined using a specialized model for the final denoising steps. The base model can also be used as a standalone module.
Alternatively, a two-stage pipeline can be used. First, the base model generates latents of the desired output size. Then, a specialized high-resolution model applies a technique called SDEdit to the latents generated in the first step, using the same prompt. This technique is slightly slower than the first one, as it requires more function evaluations.
The source code is available at Stability AI's GitHub.
Running SDXL 1.0 with Stable Diffusion WebUI
Stable Diffusion web UI is a robust browser interface based on the Gradio library for Stable Diffusion. The latest version, 1.5+, supports Stable Diffusion XL 1.0.
If you're new to Stable Diffusion web UI, follow the official guide to install and run it. If you've already installed it, simply update it to the latest version using git pull.
Next, place the downloaded base model and refiner model into the models/Stable-diffusion folder of Stable Diffusion web UI, and put the downloaded offset model into the models/Lora folder.
You're now ready to go.
Generating Images with Stable Diffusion XL 1.0 in Stable Diffusion Web UI
According to the official description, it's best to generate an image with the base model first, then refine it with the refiner model.
To generate a base image in txt2img mode:
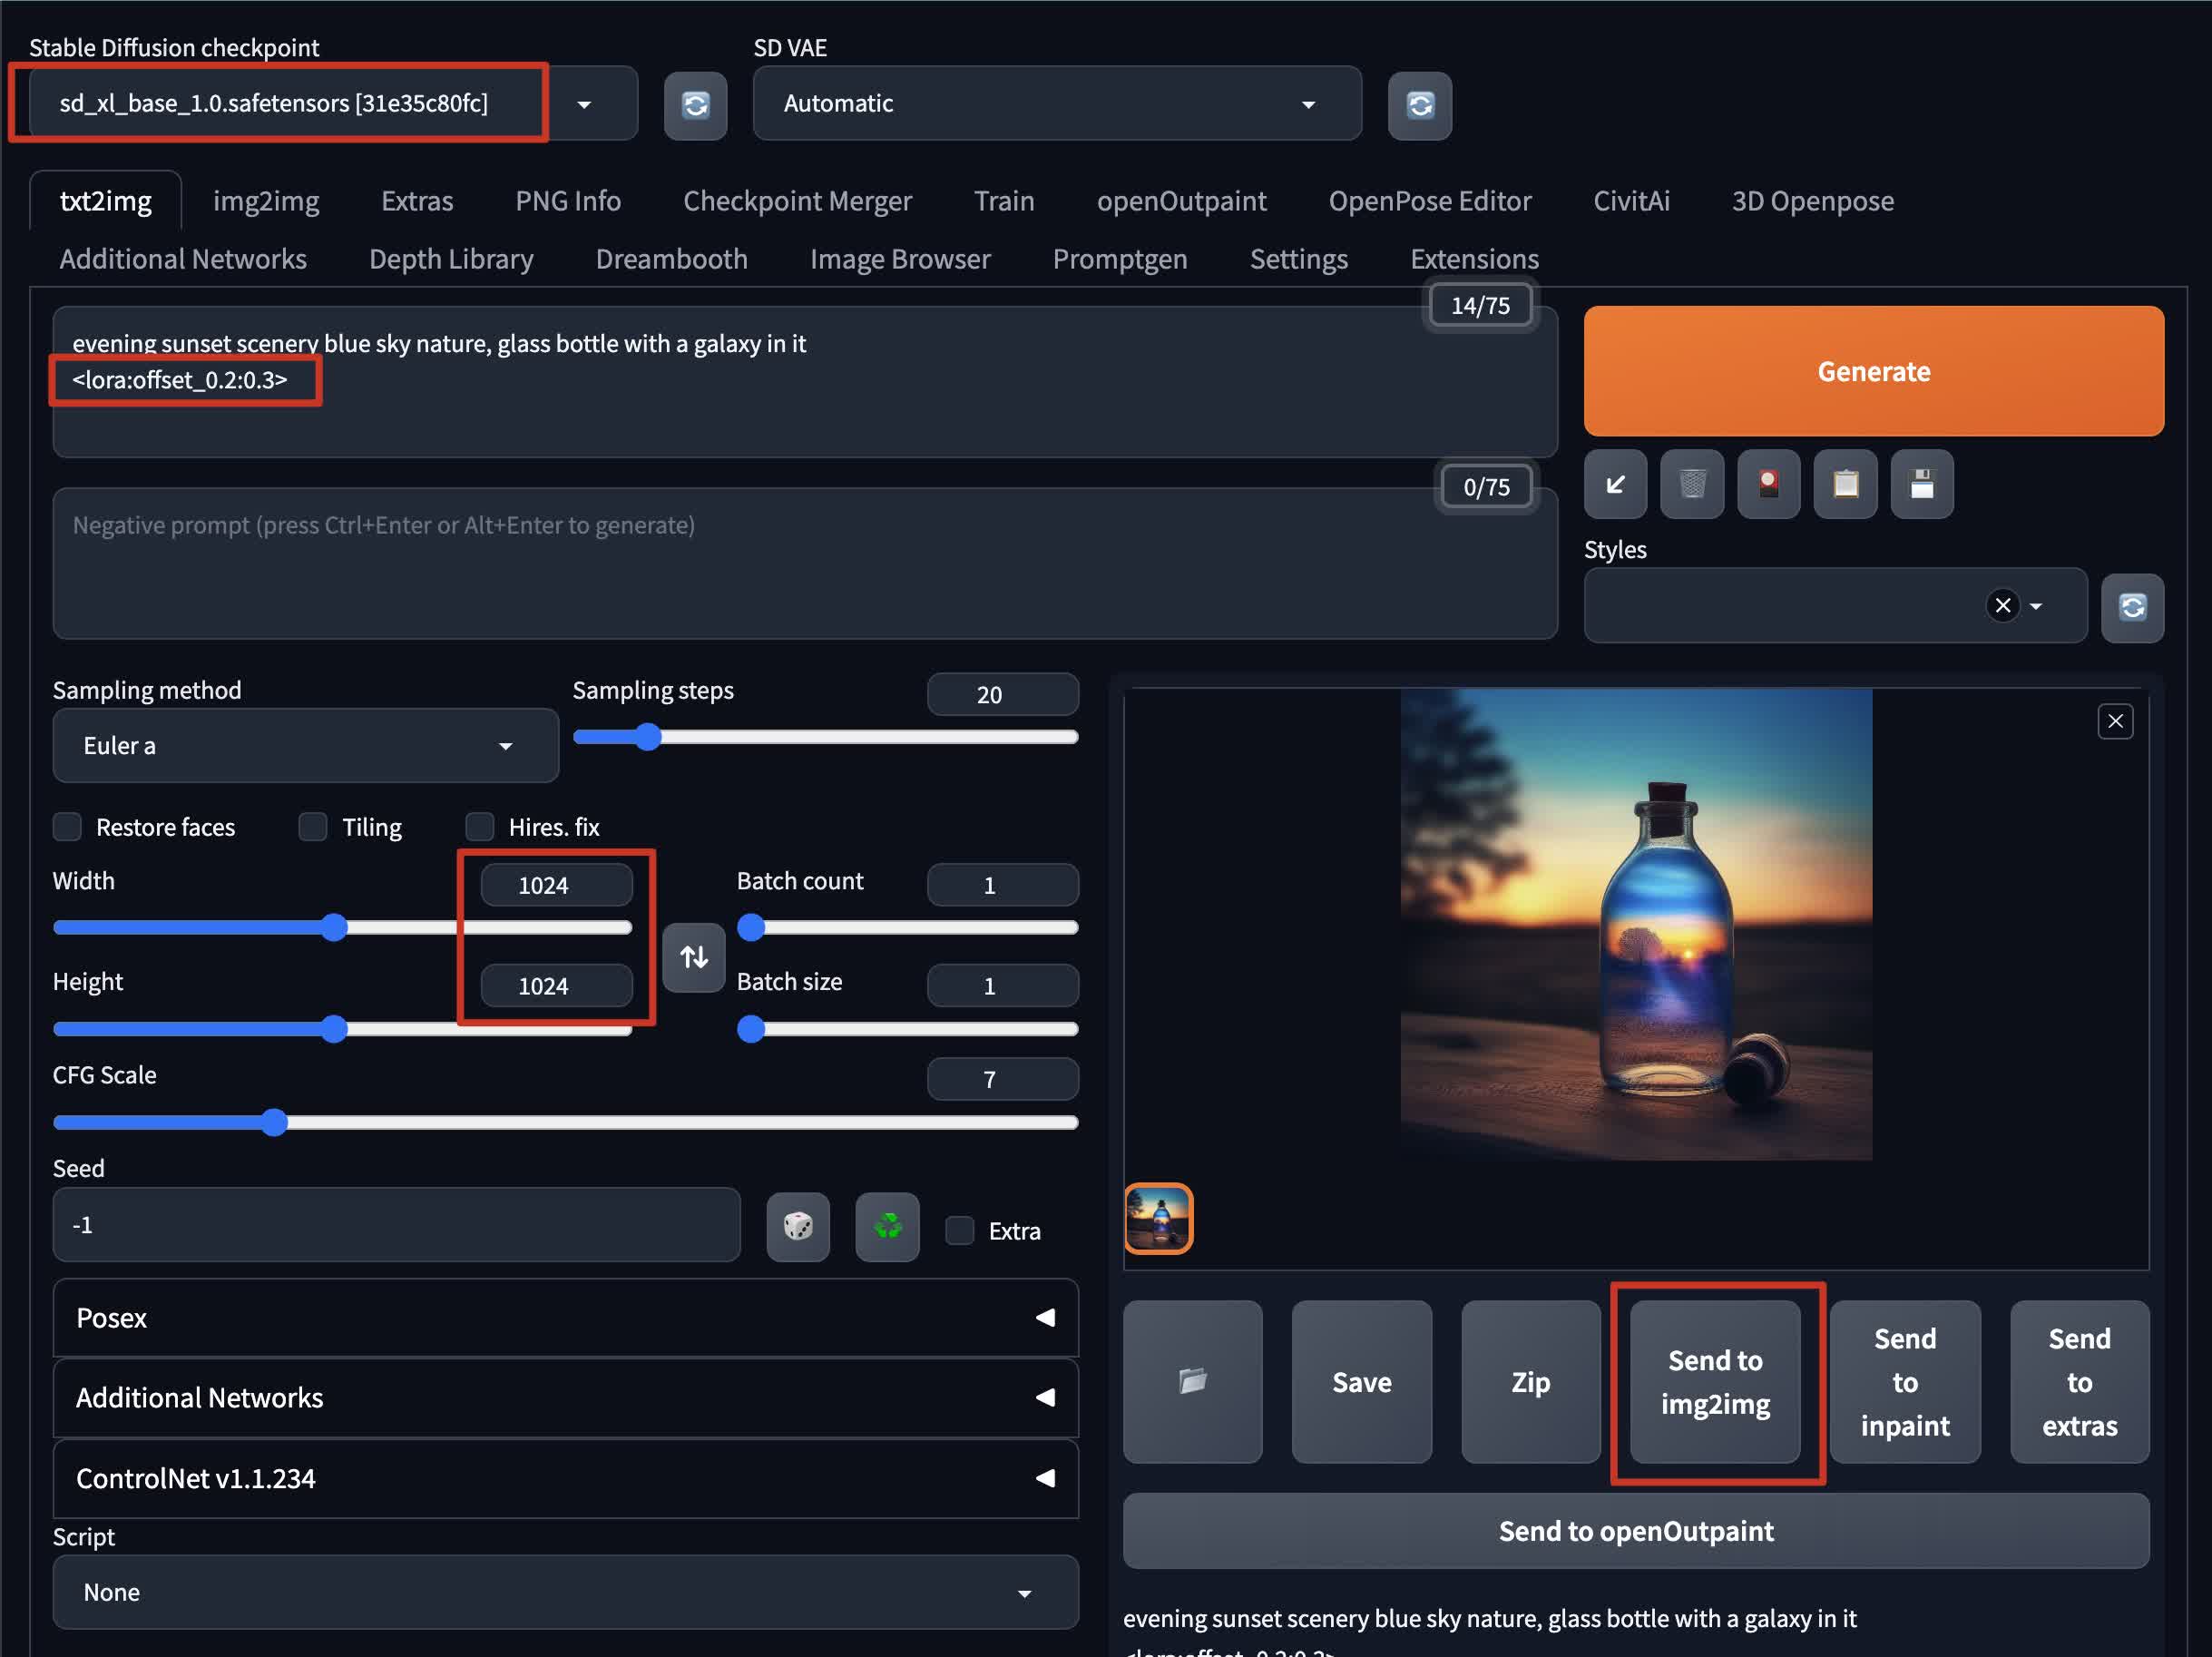
- Set the checkpoint to
sd_xl_base_1.0.safetensors - Write a prompt in the prompt box and append the offset Lora model:
<lora:offset_0.2:0.3> - Set the size to 1024x1024. This is the recommended size as SDXL 1.0 is trained on data with higher quality than the previous version.
- Generate the image
Once you have the base image, you can refine it with the refiner model:
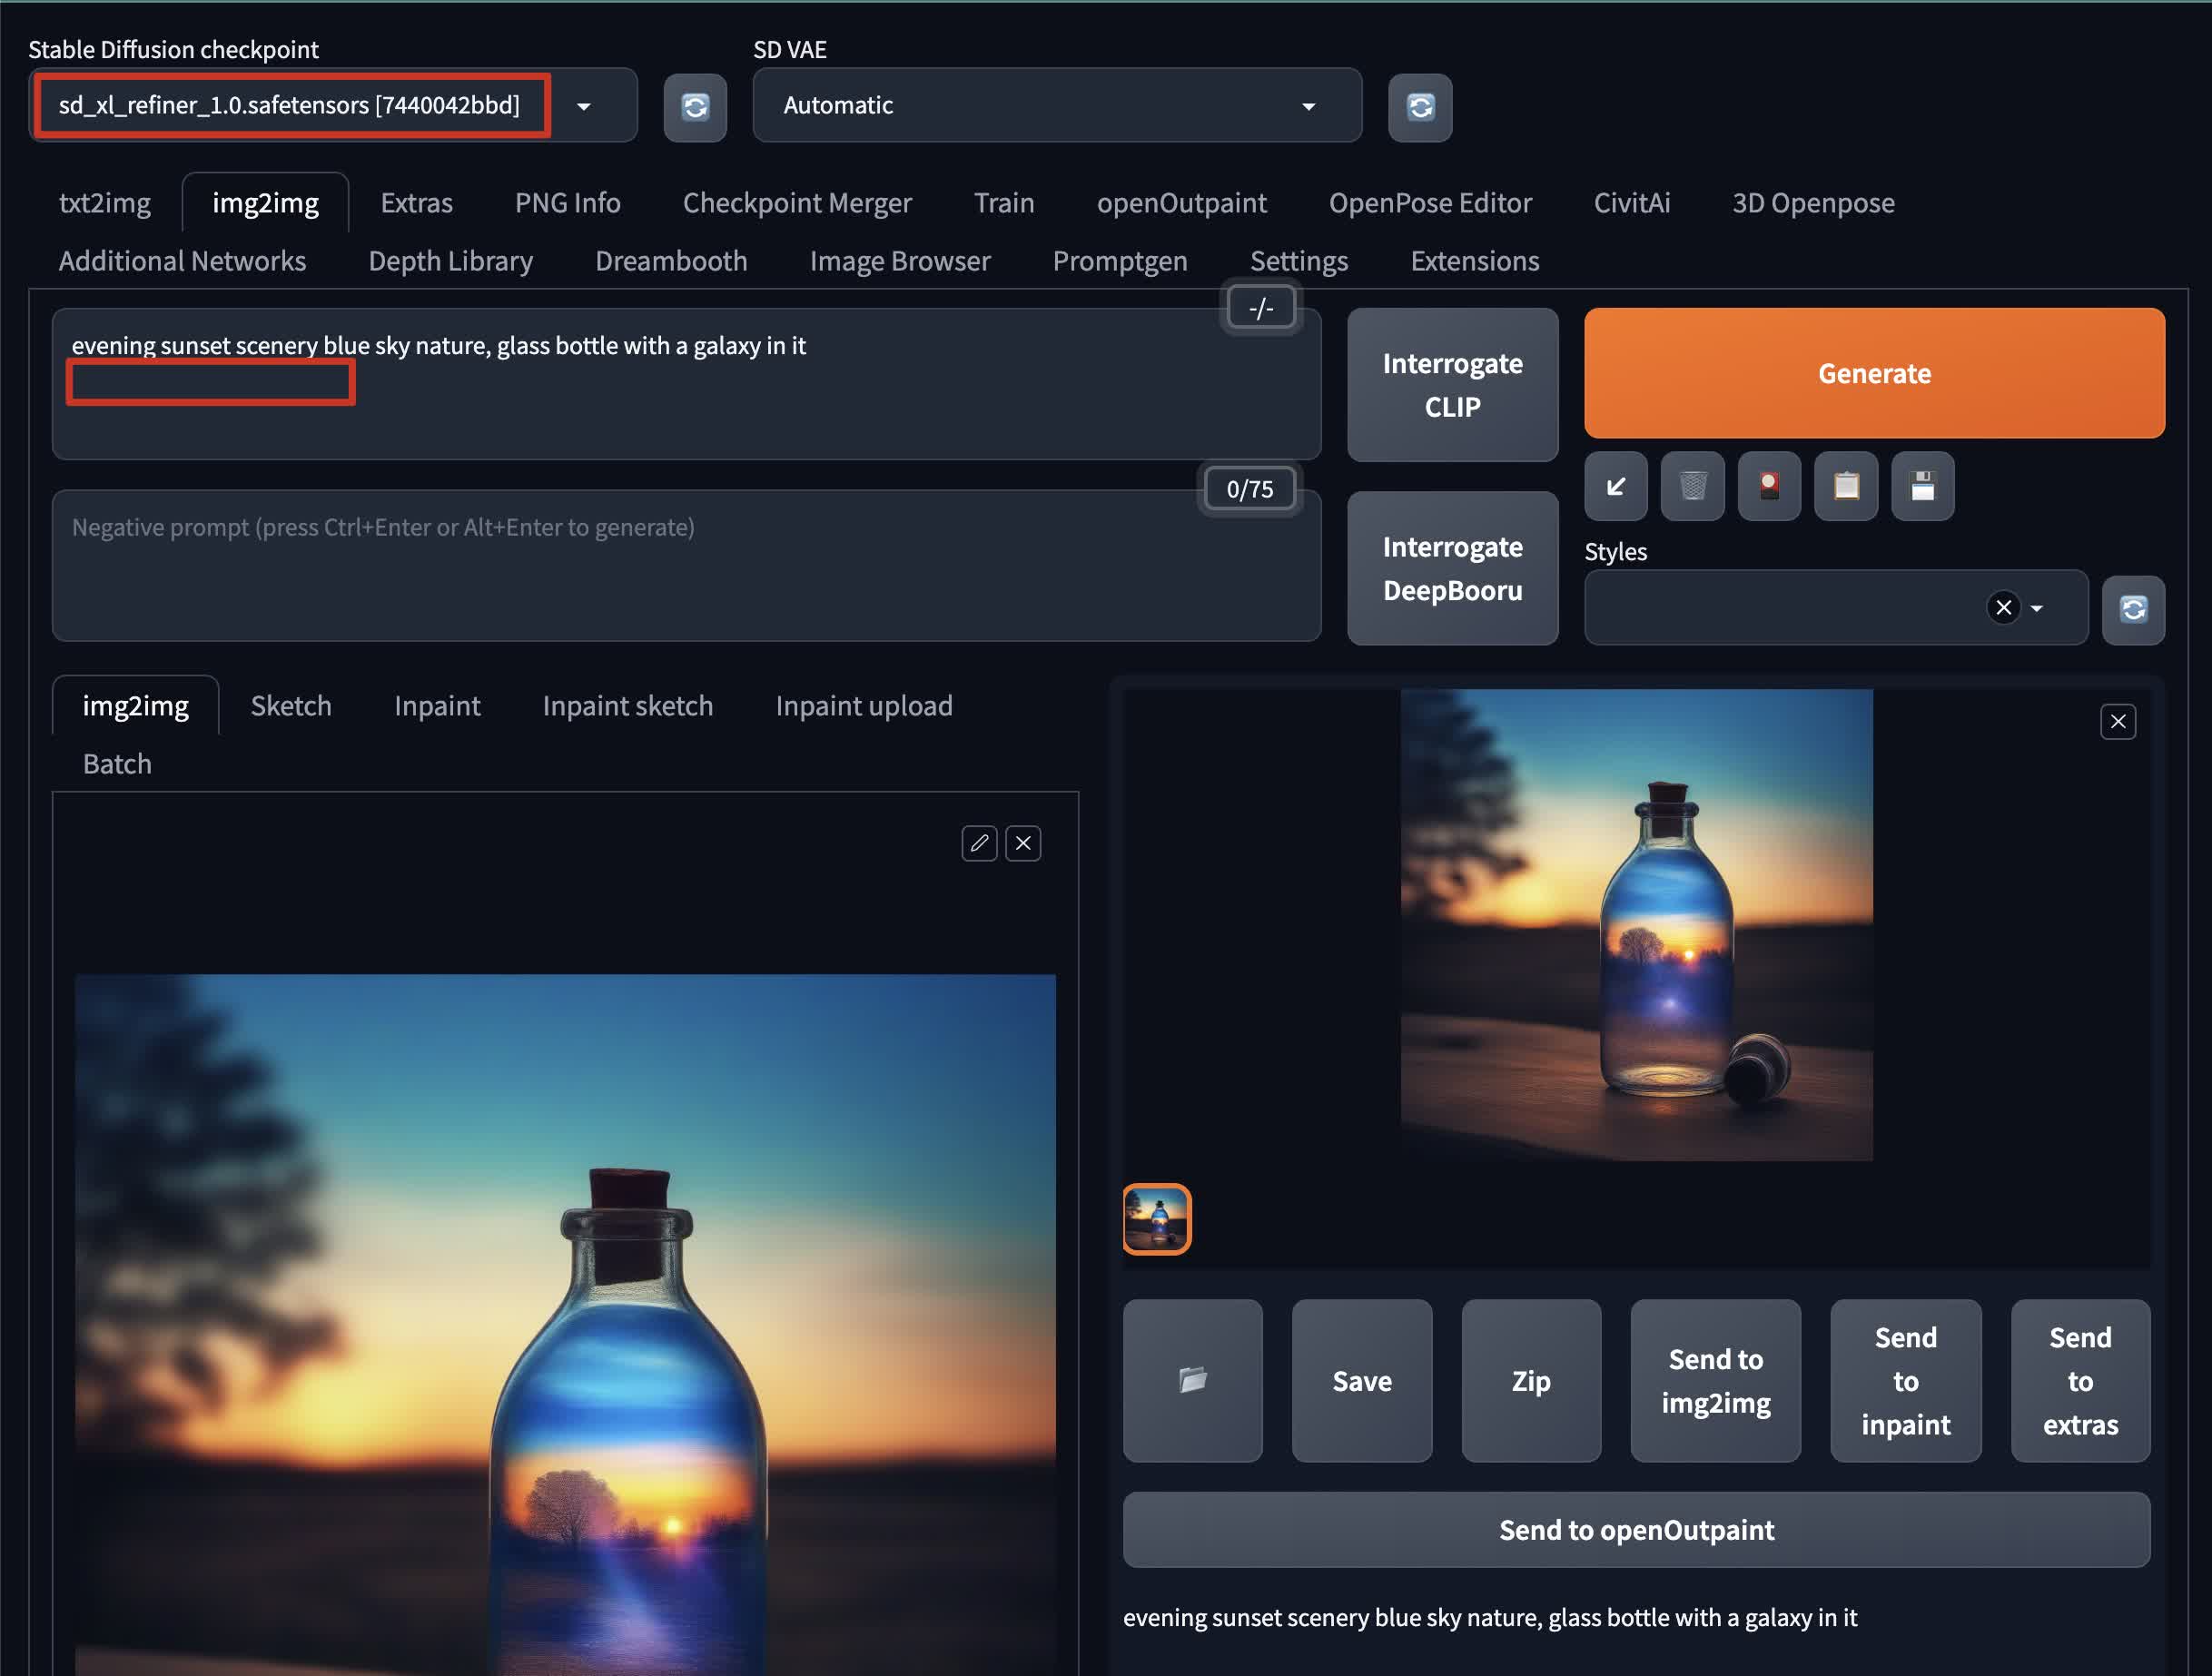
- Send the base image to img2img mode
- Set the checkpoint to
sd_xl_refiner_1.0.safetensors - Remove the offset Lora model from the prompt
- Set the denoise weight to lower than
0.2if you want the result to be as identical as possible to the base image - Optionally, you can enable
SD Upscalein theScriptsection of img2img mode for further refinement and higher resolution.
Congratulations! You've just generated an image with Stable Diffusion XL 1.0 in Stable Diffusion web UI.