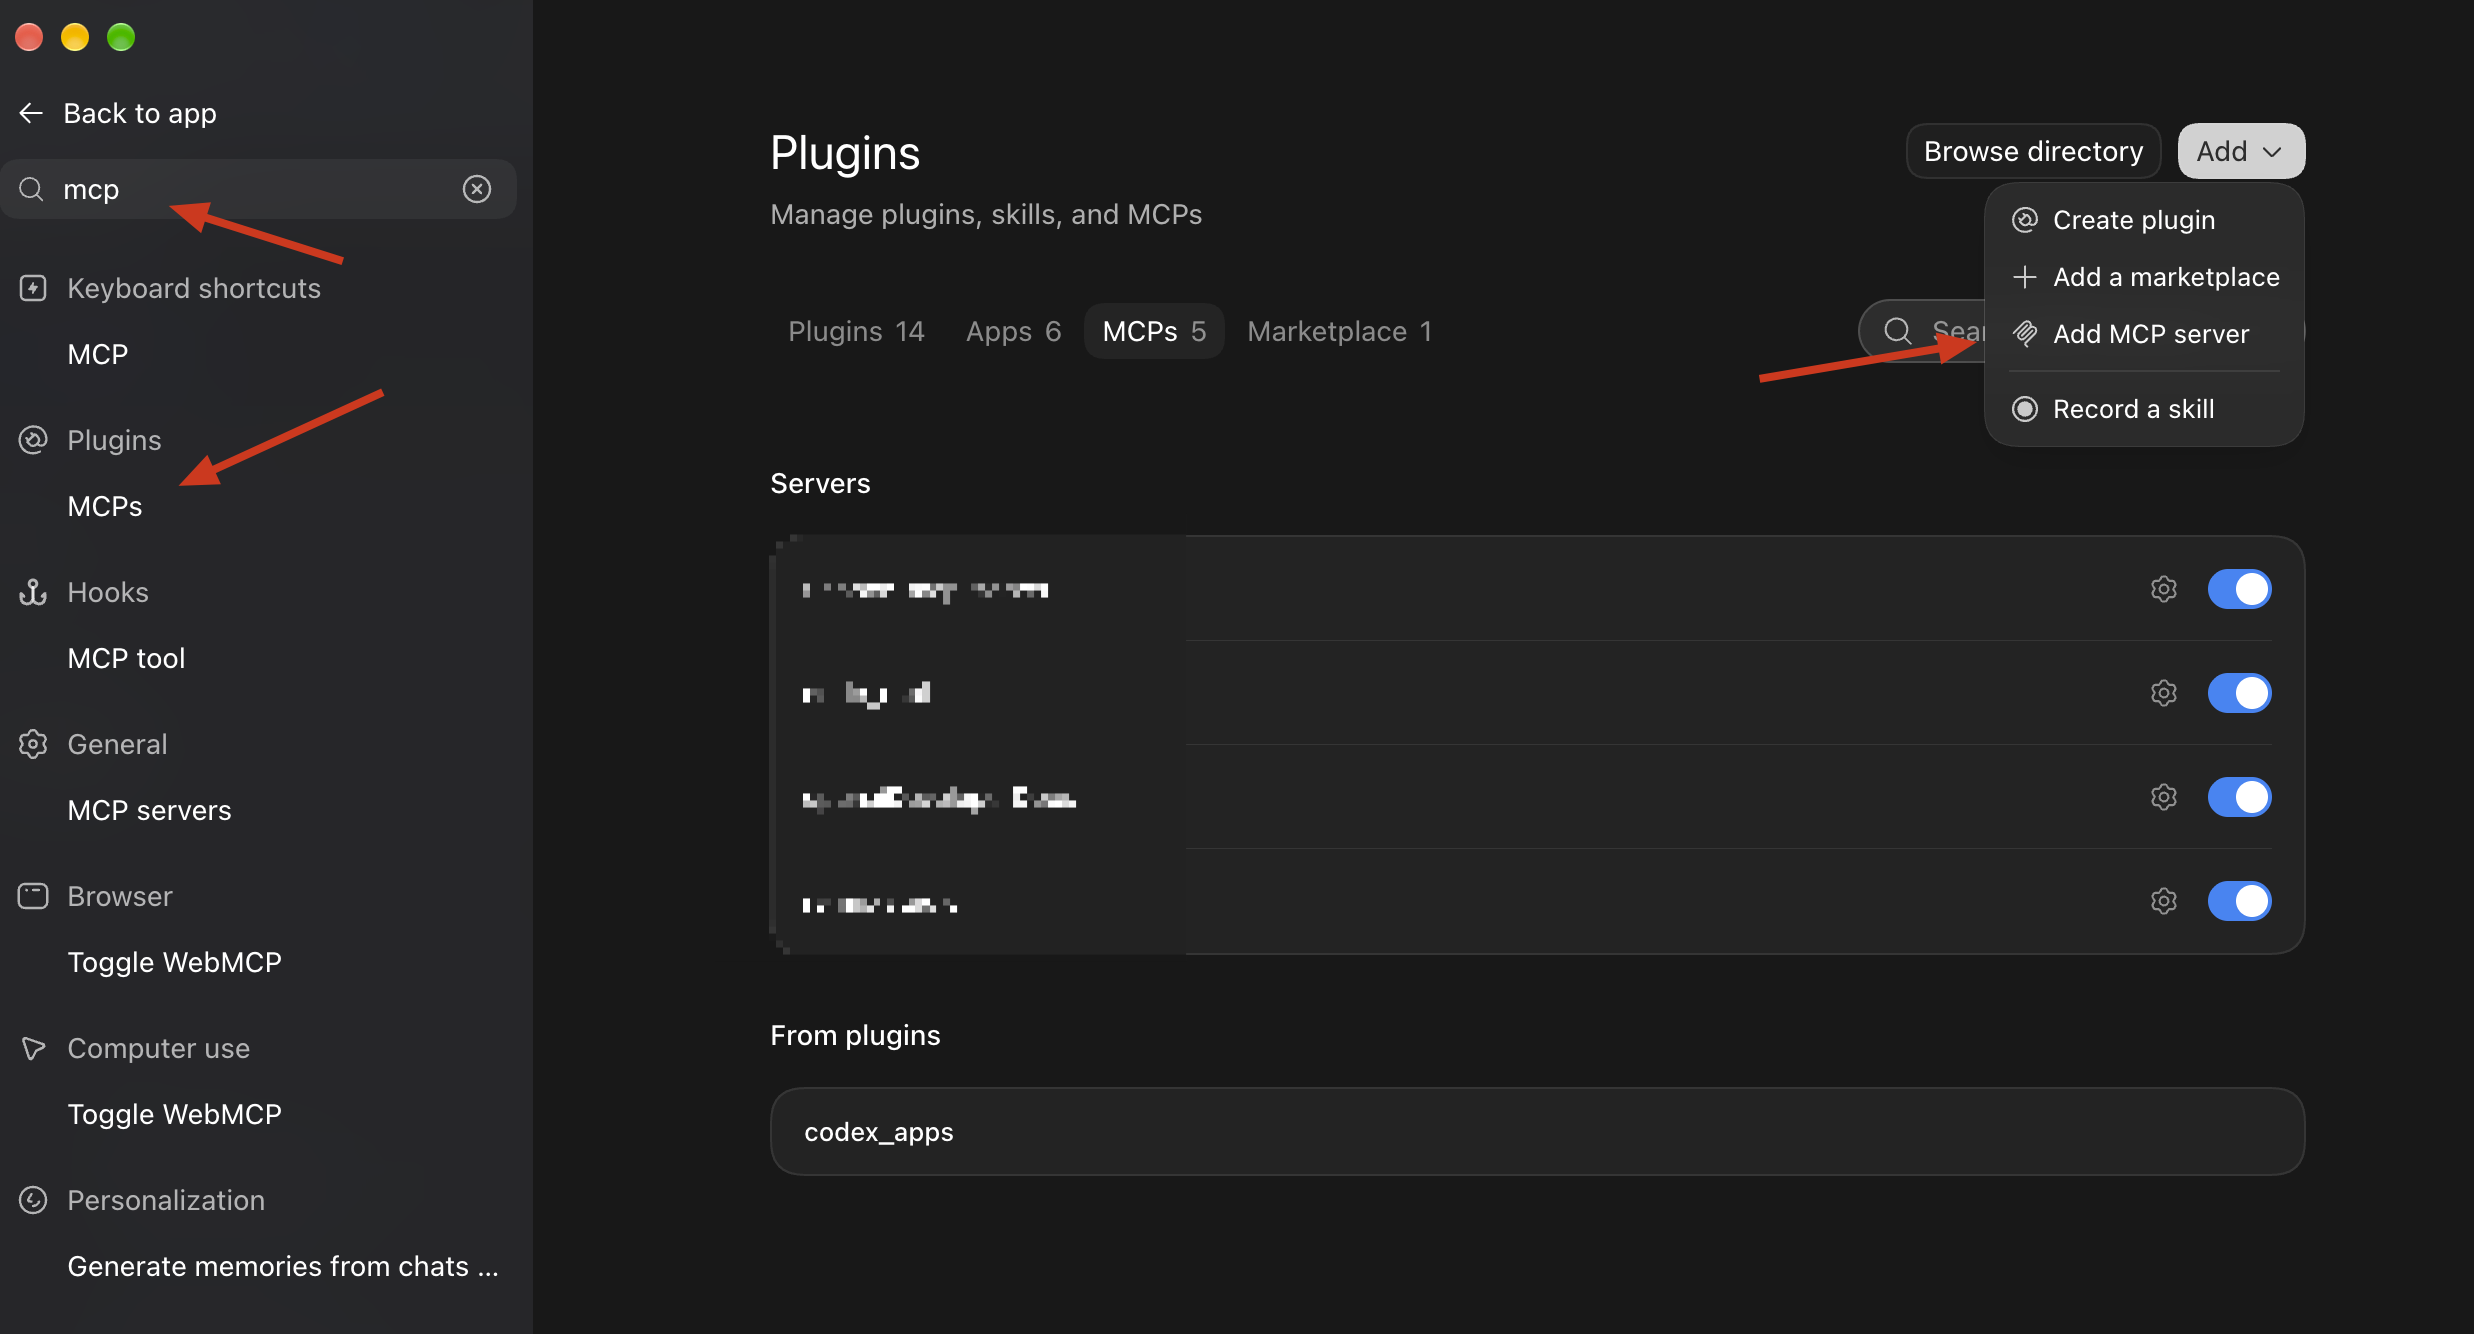
The tricky part of connecting an MCP server in Codex Desktop can be finding the right settings page. In the interface shown above, MCP connections live under Plugins, and the option to add one is inside the Add dropdown.
This walkthrough follows that interface, captured in September 2026. Menu labels can change between app versions, so use the screenshot to check whether these steps match your installation.
Basic Usage
Settings → Plugins → MCPs → Add ▾ → Add MCP server
- Open Settings.
- Search for mcp in the settings search box.
- Select MCPs under Plugins in the search results.
- Click Add ▾ at the top right of the Plugins page.
- Select Add MCP server.
- Provide the server's connection details, save, and complete any authentication or restart prompt.
The search results also include similarly named entries under other settings categories. For the route shown here, choose Plugins → MCPs.
Choose the Connection Type
MCP, short for Model Context Protocol, lets Codex use tools and context supplied by another service. Codex supports both local processes through STDIO and endpoints through Streamable HTTP. These connection types and their configuration options are described in the official OpenAI MCP documentation.
For a Streamable HTTP server, use the MCP endpoint supplied by its provider. An example endpoint looks like this:
https://your-server.example/mcp
This is a placeholder. Replace it with the actual endpoint, including its required path; the service's homepage is not necessarily its MCP endpoint.
For a STDIO server, use the command, arguments, and any environment variables specified by the provider. Codex starts that command as a local process. The required runtime must be installed on the computer running the server.
The screenshot shows where to open the setup flow; it does not show the form that follows. Use the provider's instructions for the exact values to enter.
Authenticate and Check the Connection
After saving, complete the app's restart prompt if one appears. For servers using OAuth, select Authenticate when prompted and finish signing in. OpenAI's documentation also describes using /mcp in the desktop composer to view connected servers. See its desktop setup instructions.
On the MCPs page shown above, individual servers have an enable toggle and a settings gear. Check that your server is enabled, then ask Codex to perform a simple read action supported by that server, such as listing its available resources. A saved entry alone does not establish that authentication and tool calls work.
Optional: Configure a Server in a File
Codex also supports MCP configuration in ~/.codex/config.toml. The desktop app, CLI, and IDE extension share this configuration on the same Codex host. A trusted project can have project-specific configuration in .codex/config.toml. See the official configuration guidance.
For a remote endpoint, add a table like this to the existing file:
[mcp_servers.my_server]
url = "https://your-server.example/mcp"
Replace the URL with the real MCP endpoint and choose a unique server name. Preserve the rest of your configuration. Authentication settings depend on the provider; adding a URL does not complete an OAuth login.
For the desktop interface pictured here, the shortest route remains Settings → Plugins → MCPs → Add → Add MCP server.